Image Editor
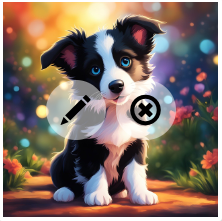
Your website comes with an online image editor to help you make simple changes to your images. Once you have selected an image, you should see a pencil overtop of it in the editing screens:

Click on the pencil to make changes to the image.
At the bottom of the image editor, you will see several features:
Filter - Applies some pre-set filters to your image, with some controls to adjust them.
Resize - Allows you to resize the image based on pixels.
Crop - Allows you to crop out portions of the image to achieve a desired image shape.
Draw - A simple tool allowing you to draw on top of the image
Text - Allows you to typeset text over an image. Note that it is usually desirable to have web text overlaid on top of an image because this way it is searchable and easy to change; however, this option is available and will embed the text directly into the image. You will be allowed to change the font, as well as the color, size, background color, and add opacity and outlines/shadows to the text.
Shapes - Allows you to add some predefined shapes to your image in a specified color.
Stickers - Allows you to add a predefined emoji-style sticker to your image.
Frame - Allows you to frame an image with some predefined frames. Note that this can be tricky to work with on your website where images are changing in size/shape and cropping to adjust to screen size, so you would want to use this only when an image is in a “contained” view.
Corners - Modifies the corners of the image.
Merge - Saves the changes to the image